Adding Organizers to Returns
Organizers can only be added to 1040 returns.
You can add an Organizer to:
- An open return
- A single return in Return Manager
- A batch of returns in Return Manager
The Comprehensive Organizer is the default organizer type added to 1040 returns. To change the organizer type, see Changing the Organizer Type.
Adding Organizers to Open Returns
To add an Organizer to an open return:
From the open return, click the Forms menu; then, expand the Organizer fly-out menu and select Add Organizer.
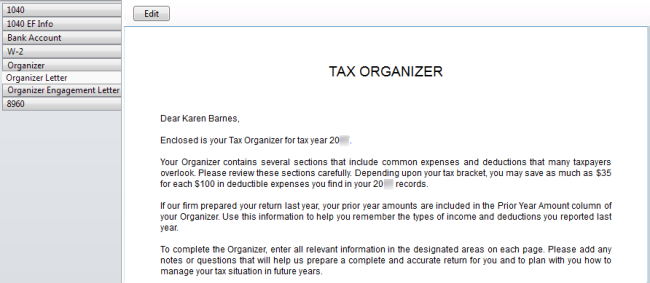
The Organizer and an Organizer Letter are added to the return. They appear as form tabs. The Organizer Letter opens immediately. To add Organizer Sheets:
- Open the return to which you wish to add Organizer Sheets.
- Click the Organizer tab so that the Organizer Options is displayed.
- Select the check boxes for additional forms to be included in the Client Organizer.

Organizer Letter
You can also add an Organizer from the Select Forms Dialog Box. See Adding Forms to a Return.
Adding Organizers to a Batch of Returns
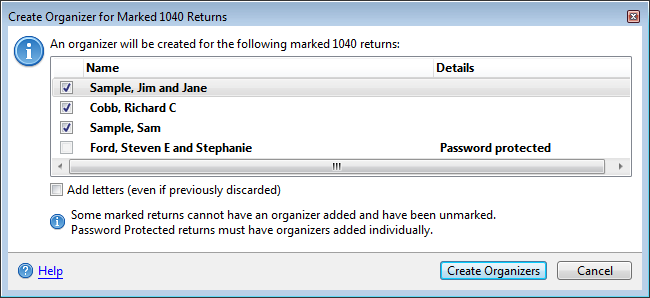
In most cases, you can add organizers to a batch of 1040 returns in the Return Manager. The only exceptions are returns that are password-protected, and returns that are currently open. In these cases, you must add the Organizer from inside the return. See Adding Organizers to Returns.
To add organizers to a batch of returns:
- In Return Manager, mark the returns to which you want to add an Organizer.
- Click the Returns menu; then, select Organizers.
- Select Create Organizer for Marked Return.

Create Organizer for Marked 1040 Returns
Open and password-protected returns will appear as locked. Organizers can only be added to these from within the open return.
- Click Create Organizers.
- Open any of the marked returns to see the Organizers.
See Also: